There is tremendous satisfaction in finishing a hand-crafted item, particularly one that has held UFO status for longer than you are prepared to divulge! I have recently completed a wall-hanging for our family room which must have been started about 6 years ago. I used a pattern called Antique Rose by Country Appliques (www.countryappliques.com)which I originally purchased to make a table runner for a friend. I liked the design so much I decided to make it up for myself too.
I made the top quite quickly, but when I came to hand-quilt it, I ground to a halt. I had hoped to improve my hand quilting technique and to this end I invested time and money in a course, new thimble, hoop and needles. Despite practising, and several broken needles later, I did not feel that my technique or stitches were any better, and the quilt top remained unfinished. Finally, in disgust, I decided to go back to my previous method and just “do it”.

Quilting the border.
I had used all the other Aurifil cotton thread weights before for various applications, but this was my first time hand-quilting with 28 weight It proved to be a fine, but strong and smooth quilting thread, and I was really spoilt for choice when it came to choosing the colour, as there were several colours available which were all suitable.

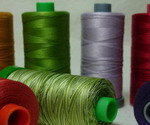
I used Aurifil Cotton Mako 28 weight for the quilting
Because some of the quilting was on dark blue fabric, I used a Sewline ceramic marking pencil with a white lead to mark my lines. (http://www.sewline-product.com) I have used this pencil extensively for marking fabric (not just for quilting but for applique etc as well) and the white shows up on most colours, even the pale ones, but other coloured leads are available too. Because it is a propelling type pencil you always have a sharp point and the marked lines are easily removed by gently rubbing or sponging with a damp cloth. Sewline marking pencils and other products are available from the Always Quilting online store. (www.alwaysquilting.com.au) Look under tools/marking tools.
My husband likes to do a bit of woodwork. This is very handy in more than one way. If I ever feel a tad guilty for indulging in quilting paraphernalia, I remind myself of all the tools in his workshop and immediately feel justified! It’s even better if my handy husband turns his hand to making something for our home (In the past he’s made bookshelves, occasional tables, built in cupboards etc). A number of years ago he fashioned a big lightbox for me and most recently made a beautiful hanger for my completed wallhanging.

Applying polyurethane to the quilt hanger,
He had been given a number of pieces of aged timber, very solid and heavy, which he thinks are red gum, which he chose to use for the quilt hanger. It is a lovely rich red colour and does not require any stain, just a coat of poly-urethane.

Waiting for the polyurethane to dry.
The finished wall-hanging and wooden hanger look like this.

The finished quilt and hanger.
Very satisfying indeed!!!
Filed under: Applique, Aurifil, Cotton Mako' Ne 28, Home page, Patchwork, Quilting | Tagged: Always Quilting, applique, Aurifil Cotton Mako Ne28, hand quilting, marking tools, Patchwork, quilt hangers, wall hangings | 4 Comments »


