Pinwheel Passion

At the beginning of this year, I celebrated the birth of my first grandchild, and like quilting grannies through the generations, wished to mark the occasion with the creation of a quilt.

I decided to ignore all the beautiful baby quilt patterns available commercially and design my own quilt using the pinwheel block with three narrow borders, using bright fabrics on a white background.

Camera file jan2015 075To make the pinwheel block I used a technique  where you start with squares.

You take 2 squares of contrasting fabric and sew them right sides together, with a 1/4 inch seam all the way around the edge.

Dec2014 Jan2015 027

Pinwheel squares sewn with 1/4 inch seams around the perimeter.

Then you cut the joined squares on each diagonal, being careful not to move the squares out of alignment as you rotate. (Tip: move your cutting mat around, not the squares, or better still, invest in a rotating mat!)

Dec2014 Jan2015 028

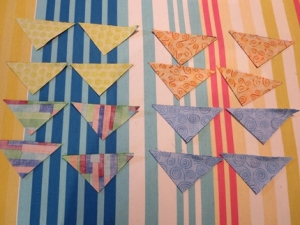
Cut the sewn squares diagonally.

Press the seams on your triangles, firstly as closed seams, then open them out and press with the seam in the direction of the darker fabric.

Dec2014 Jan2015 030

Pressing seams closed first.

Dec2014 Jan2015 031

Now press seams open and towards the darker fabric.

At this point you will have four matching squares which you arrange to form the pinwheel design and then sew  together.  TQH 001

Sorry, I forgot to take a photo of this when I was making my quilt so the sample looks a little different.

TQH 002-crop

Joining the pinwheel block.

If you wish to see a video of this technique and find out how large to cut your squares to reach the desired block size go to http://blog.missouriquiltco.com/update-on-the-easy-pinwheels/  You may notice that there is a great deal of confusion about the cutting size required to obtain the pinwheel square you require. The following method is accurate:

Take the finished size you wish your block to be (i.e. without any seam allowance)

Multiply by 1.41

Divide by 2

Add 1.25

Round up/down to the nearest eighth of an inch.

This will make a block which includes seam allowance so that when you have joined it to its neighbouring blocks it will be the accurate size.

I needed to make 50 pinwheel blocks and cut 49 intervening plain white ones.

Having done that, I then arranged them in a pleasing layout. In the photo below I have mine pinned to an old sheet. Theoretically no two blocks were supposed to be the same, but there are two that are!!

Dec2014 Jan2015 041-crop

Arranging the layout of the blocks.

I then added the borders:a narrow plain white border, a pieced border using strips of all the fabrics used in the quilt, and finally another narrow white border. I also used white fabric to bind the quilt. This gave the effect of the pinwheels and border “floating” on the white background.

Camera file jan2015 074

White borders and binding.

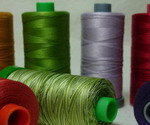
To quilt the quilt I used a design called Curlz by Patricia Ritter. Throughout the quilt, for piecing and quilting, I used Aurifil Cotton Mako 40.

Camera file jan2015 047

Quilting my quilt on my long-arm machine.

Ta Da!! My completed quilt.

Camera file jan2015 074

My completed pinwheel quilt.

Tuesday Tips – Do you have a “shaggy dog”?

When I first learned how to rotary cut and machine piece ( back in 1994), I was fortunate to have a very thorough and well-organised teacher.  She taught me all the necessary basics as well as many little extra tips. One of the things I remember her teaching us was to use a “shaggy dog” to avoid a “bird’s nest”.

You’re probably wondering what on earth she was on about, as I did too.

Picture this…. you’re all set to begin piecing, everything is pinned/placed in position, you start to sew and the sewing machine doesn’t start smoothly. It coughs and grunts and creates a tangle of threads on the underside of your fabric. (The “bird’s nest”) GRRR!!!

Experienced sewers will know that this problem can be eliminated by holding onto both the top thread and the bobbin thread for the first couple of stitches. However you can also take a small scrap of fabric (never a problem for patchworkers!), fold it over so that you have two thicknesses of fabric and position it under the needle, running it from front to back. The movement of running it in this direction ensures that both threads are out of the way and not likely to be caught in the initial stitches taken by the machine.

It should be positioned so that when you start sewing the first few stitches will be on this scrap.

Spring 2014 030

Start sewing on your shaggy dog.

You can then place your real sewing close to the edge of the scrap and continue sewing onto it.  This will result in a smooth start and undistorted sewing of your pieces.

Spring 2014 035

Going from the shaggy dog to the piecing.

Use this scrap starter each time you commence a new seam or a  length of chain piecing. Snip between each segment after you have reached the end of the seam or chain.

Spring 2014 034

Cutting the shaggy dog from the other pieces.


Spring 2014 001

Can you see the shaggy dog in this piece of chain piecing?

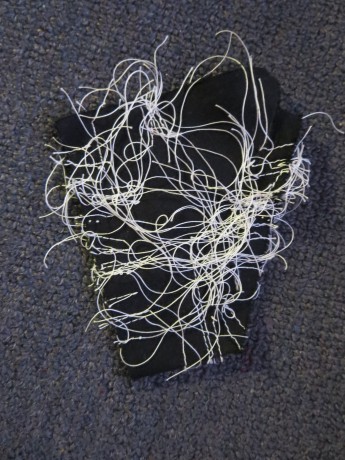
Before very long your scrap starter will begin to look decidedly “shaggy”, hence the “shaggy dog”.  When it becomes too untidy, retire that “dog” and start a new one.


Spring 2014 036

Ready for retirement.

Some sewers like to have another shaggy dog which they use at the end of their piecing.   It then is in place for the next piecing sequence.

Bonnie K Hunter uses this method which she call “leaders and enders”.  She even uses this technique to generate extra quilts!! You can read about her work and books at: http://quiltville.com/leadersenders.shtml

Do you have shaggy dogs at your place?


Spolit on Mothers’ Day (Mothers’ Day Spoils)

Many of the gifts I am given are related to quilting, and this Mothers’ Day was no exception.  I received two beautiful quilting books.  (I must admit, I did have a hand in their purchase, but my family members are all well-trained and quite happy to indulge me!)

One of the books I received is Di Ford-Hall’s “Primarily Quilts”.  I have long been a fan of Di’s patterns and when I heard that she was publishing a book I was eager to own a copy.

Camera file May 2013 326

The book is published by Quiltmania, (www.quiltmania.com) and is beautifully set out with lots of photos and text in both French and English.

Primarily Quilts blog post 002

A look inside the book.

The book has 240 pages, containing  16 of Di’s patterns, so there are plenty of quilts to tempt me, and yes, there are several I would like to make! The quilts are inspired by nineteenth century quilts and use techniques which include hexagons, broderie perse,  fussy cutting, hand and machine piecing and lots of applique. (Quilting heaven). I am pleased that all patterns and templates are full size so there is no need to enlarge, and the three large pull-out pattern sheets all seem very clear.

Now I must confess that one of my UFOs is a quilt made from a Di Ford pattern, but one which is not in the book. It is “Homage to Sally Ann” which I began over five years ago and stitched while on a 15 week trip around the eastern half of Australia.  I came back from my holiday, but Sally Ann appears to have left on one….and no progress has been made for a long time.

Primarily Quilts blog post 005

The incomplete centre block.

The original quilt was on a cream background with mid to deep pinks and burgundy flowers, and I have also seen Helen Hayes Sally Ann quilt which is on a vibrant red background.  As you can see, mine is different again, being on a pale aqua background with coral, gold and brown flowers.

Primarily Quilts blog post 006

One of the corner blocks.

Aurifil Cotton Mako 50 weight thread (the finest weight) is my choice for the needleturn applique I use in this project.

And now that Sally Ann has reappeared I might have to add the odd flower or two!

As for the other book I received on Mothers’ Day, I’ll write about that in a future blog post.

Now Sally Ann, where were we….?