When I first learned how to rotary cut and machine piece ( back in 1994), I was fortunate to have a very thorough and well-organised teacher. She taught me all the necessary basics as well as many little extra tips. One of the things I remember her teaching us was to use a “shaggy dog” to avoid a “bird’s nest”.
You’re probably wondering what on earth she was on about, as I did too.
Picture this…. you’re all set to begin piecing, everything is pinned/placed in position, you start to sew and the sewing machine doesn’t start smoothly. It coughs and grunts and creates a tangle of threads on the underside of your fabric. (The “bird’s nest”) GRRR!!!
Experienced sewers will know that this problem can be eliminated by holding onto both the top thread and the bobbin thread for the first couple of stitches. However you can also take a small scrap of fabric (never a problem for patchworkers!), fold it over so that you have two thicknesses of fabric and position it under the needle, running it from front to back. The movement of running it in this direction ensures that both threads are out of the way and not likely to be caught in the initial stitches taken by the machine.
It should be positioned so that when you start sewing the first few stitches will be on this scrap.
You can then place your real sewing close to the edge of the scrap and continue sewing onto it. This will result in a smooth start and undistorted sewing of your pieces.
Use this scrap starter each time you commence a new seam or a length of chain piecing. Snip between each segment after you have reached the end of the seam or chain.
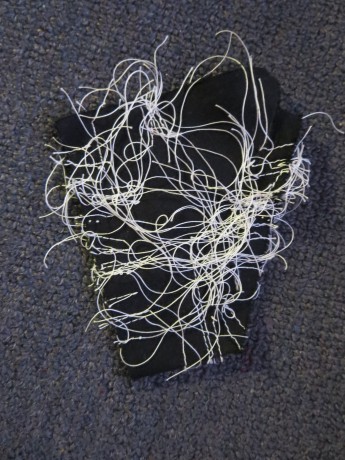
Before very long your scrap starter will begin to look decidedly “shaggy”, hence the “shaggy dog”. When it becomes too untidy, retire that “dog” and start a new one.
Some sewers like to have another shaggy dog which they use at the end of their piecing. It then is in place for the next piecing sequence.
Bonnie K Hunter uses this method which she call “leaders and enders”. She even uses this technique to generate extra quilts!! You can read about her work and books at: http://quiltville.com/leadersenders.shtml
Do you have shaggy dogs at your place?
Filed under: Home page, Patchwork | Tagged: chain piecing, machine piecing, scraps | 2 Comments »


